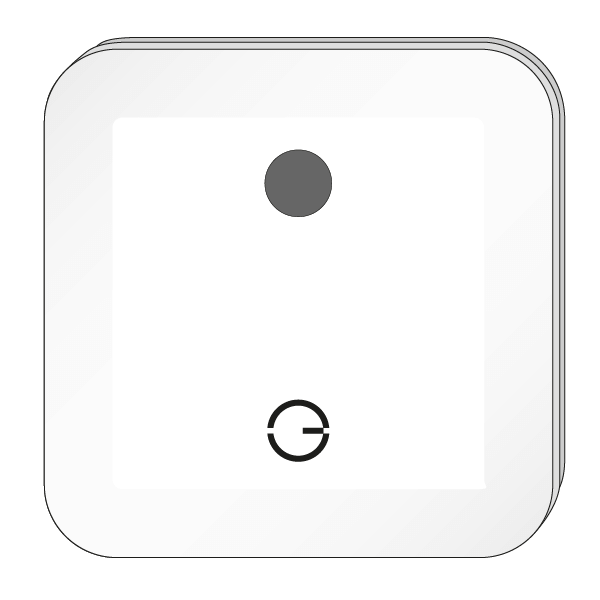
The first component to be installed is the Genius Hub. This is the 'brains' of the system, which communicates with all of the other devices and allows you to control your heating remotely.
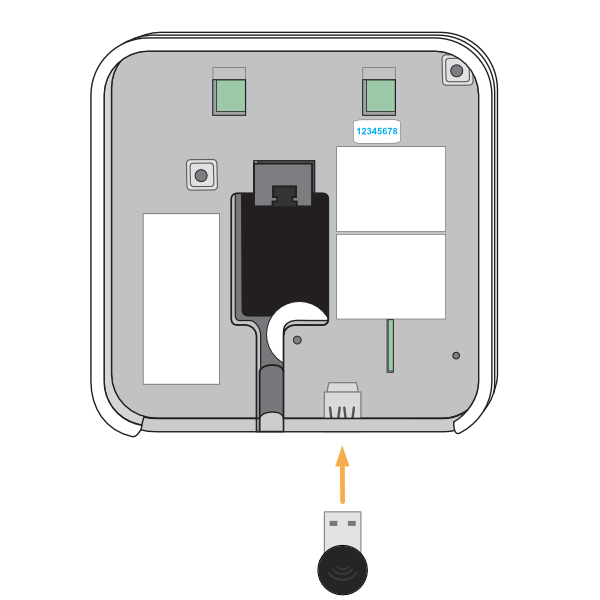
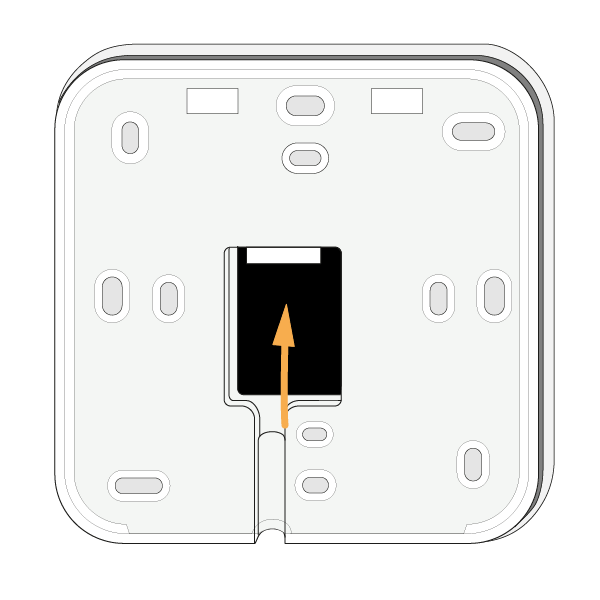
The Genius Hub can be placed flat on a surface, such as a cabinet or mounted on a wall. To mount it onto a wall, first remove the back plate by turning the Genius Hub around so the logo is facing away from you with the cutout for the Ethernet cable (see point 3) at the bottom. Slide the segmented back plate in the centre of the Genius Hub down, holding the outside of the Genius Hub. Once it has moved approximately 1 cm down, it can be pulled away from the Genius Hub. The back plate can be screwed to the wall with the segmented part facing the wall. Make note of the 8 blue characters for Chapter 2.
Before you screw the backplate to the wall, place the Ethernet Cable through the cutout so it is between the backplate and the wall.
- If you have Genius Radiator Valves, ensure that the Communications Adapter is installed into the Genius Hub. If it is not, insert the Communications Adapter into the USB port found at the bottom of the Genius Hub.
ERROR
The requested URL could not be retrieved
The following error was encountered while trying to retrieve the URL: https://confluence.geniushub.co.uk/*
Connection to 94.173.17.80 failed.
The system returned: (110) Connection timed out
The remote host or network may be down. Please try the request again.
Your cache administrator is webmaster.
Generated Sat, 23 Nov 2024 14:06:05 GMT by ip-10-19-3-13 (squid)
- Connect the Genius Hub to your Internet Router using an Ethernet cable, such as the flat one provided. This fits into the port located in the middle of the rear of the Genius Hub.
- Plug the USB power cable, both to the Genius Hub (until you hear it click) and into the power supply provided, and plug into a wall socket. A green light will appear on the left hand side.
- When the Genius Hub successfully connects to the broadband router, a second regularly flashing green light will appear on the left hand side.
- Do not power the Hub from a USB port on the Internet router - it will not provide enough power to operate the Hub correctly.
- The low power wireless communication to other devices is easily stopped by thick walls, large objects and water.
- Ensure that the Genius Hub is in an open space and not hidden away behind any heavy objects. For optimum RF communication, fit the unit above floor level, and at least 30cm away from metal objects & appliances such as: boiler, hot water tank, microwave oven, cooker, fridge/freezer, stainless steel sink, TV, set-top box (satellite/cable/Freeview), radio, printer, photocopier or computer (desktop/laptop).
- Do not place within 100cm of RF devices, such as cordless phones, mobile phone or Wi-Fi signal boosters, or Wi-Fi routers. It may be necessary to relocate the unit if problems with communication occur. Mobile phones should not be used or placed in the vicinity of this unit.


